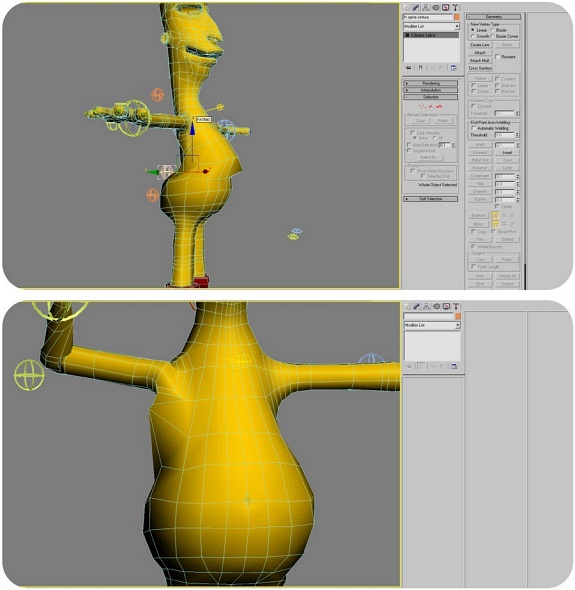
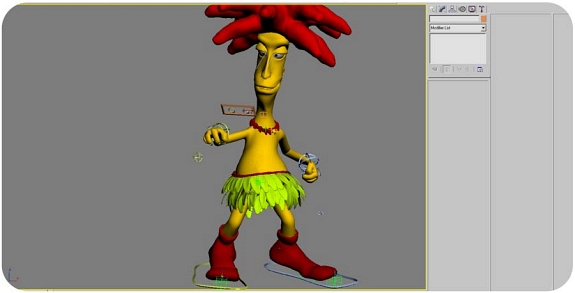
Hello again, Jalo here, how are yours? I hope you are
fine..... In the part number 1 of this tutorial we saw conceptualization
and modeling and we spoke of the important thing that it is, to prepare
correct modeling, that soon was animated, then being started off to be
anticipated that we mentioned before, the idea concept and modeled and
now, we passed to rigging and skinning....
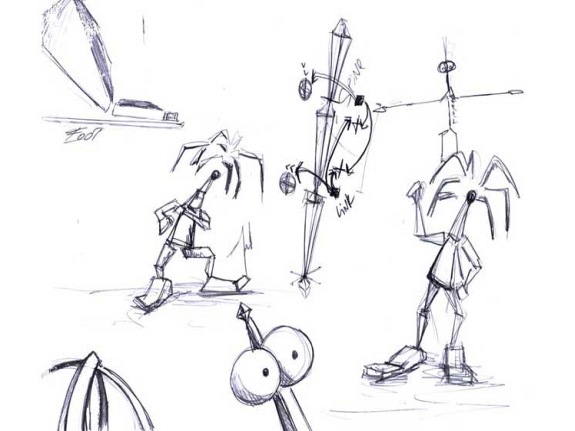
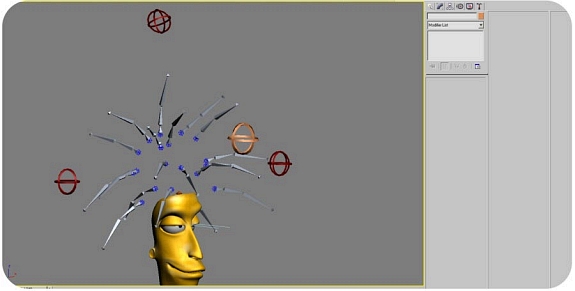
It is very important that we have think well, that type
of structure and movements to the character... like the face expressions.
He is important to know this well since on the basis of the movements that
we want that it does bob, beginning to draw some structures and part of
the system of rigging is to another good bigging.
Wath is rigging? .. for that you do not know it,
summarizing it it is the structure of the body that goes to cause that our
character move.... like our body. We have bones and these bones move on
the basis of muscles... in this case the animator is the muscle of those
bone to moves.
And skinning is the skin that is going to surround
to the bones... in truth the skin is modeled which we did previously and
the in fact this serious system that helped to deform the modeling one of
the character, like a language says to the structure of rigging something
as well as that this between means of rigging and modeled... the method is
skinning....
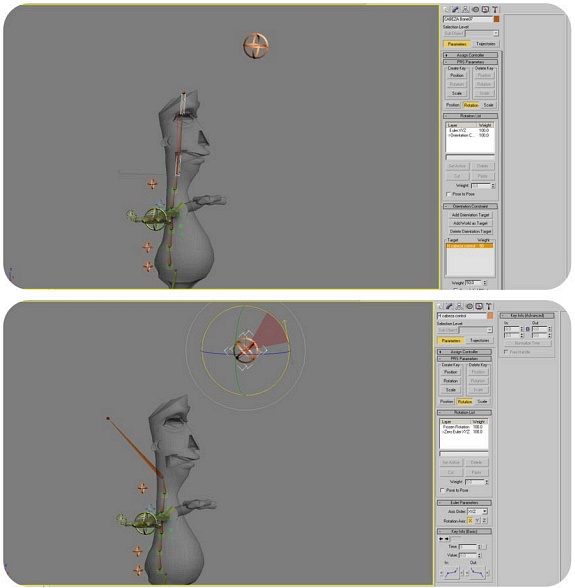
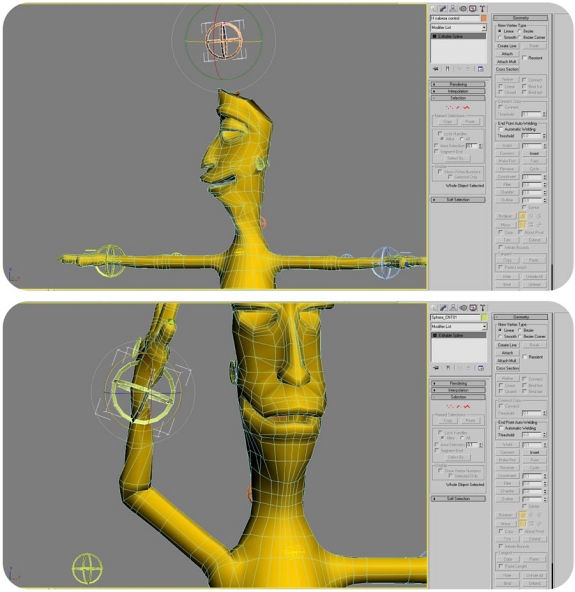
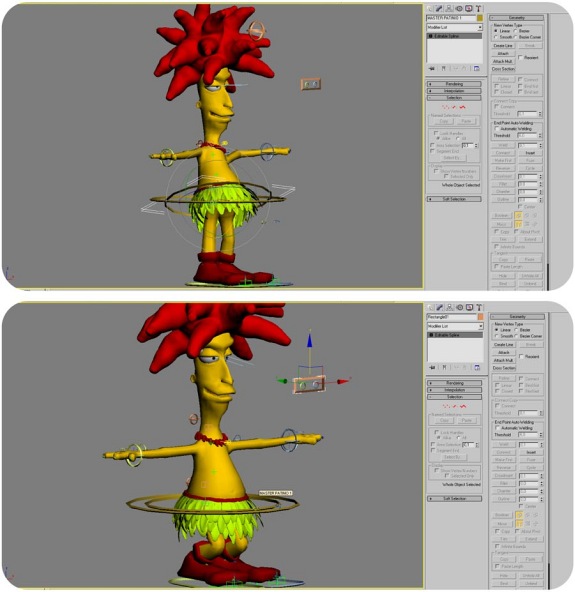
Rigging....
We
began with rigging of the Spine. I like to begin by this part... I have to
go step by step solving the difficulties..... (they consider that this
rigging is probable that it works for 70% of the takings that are needed
and that of insurance there are to construct some others for realy you
need specify scenes....) The Spine is a very important point at the time
of creating animation... and when an animator tries to give him life to
the character this must respond correctly and not to have movements rare,
are several forms to do rigging for a Spine but I am going to tell the one
them that uses...for Sideshow Bob.
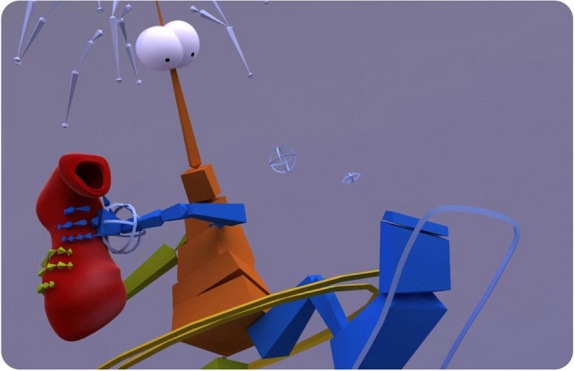
The used commands in this character in rigging are
hierarchy (Link) constraints, reaction, wirring, and try to visualize it
in your minds, like a structure to create.
We have a pile of bones and these we are going to control
to move it them by means of helpers or ui to parameter controlers, all of
them to create dependencies of objects for soon is but natural and easy at
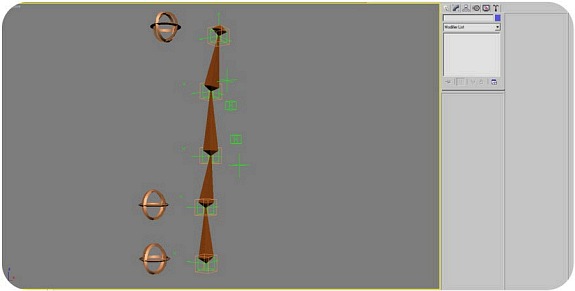
the time of animating it.... Start to draw to 4
bones for the Spine which are going to control by 3 helpers visible for
the animator. And other that will be for the Riggerman and a line spline
with 5 vertex that when applying to them modif. Controler// spline IK to
controler// with Link option is not the base to
begin.
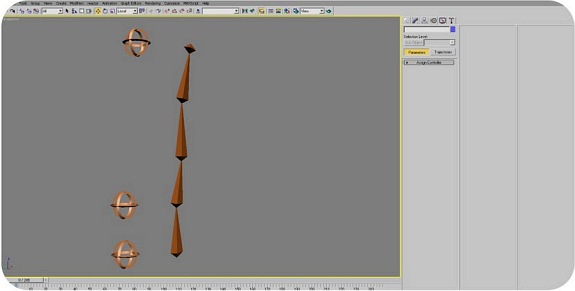
After creating 4 to helper that they above helped us to
to the dependency of movement between the vertebrae, when we move those of
down and vice versa... this dependency is created with position
constraints, creating a progressive movement, example... a 10 movement
that if first and the last chain moves 2.... Those of means are what they
have position contraint.
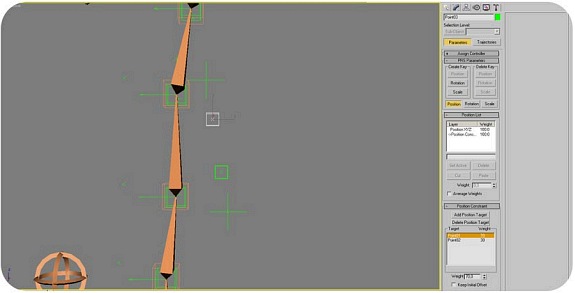
Now the easy part je.... Link the part that has
the dependency to link the 3 IK controls of spline and next helpers that
also to ik control corresponding to its height in the
Spine.
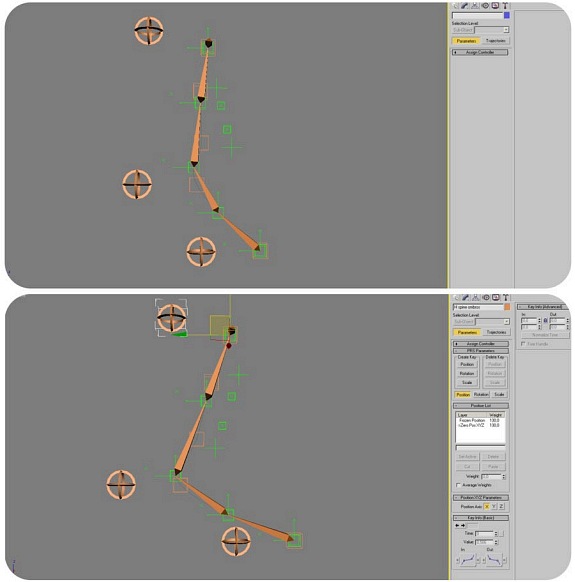
The idea is to create dependencies of movements this
is not the solution for all the character is a possible one for this. The
important thing is that they understand the process that is due to create
and on the basis of this one it can be creating new riggings for
situations in which one must solve the diverse situations that appear
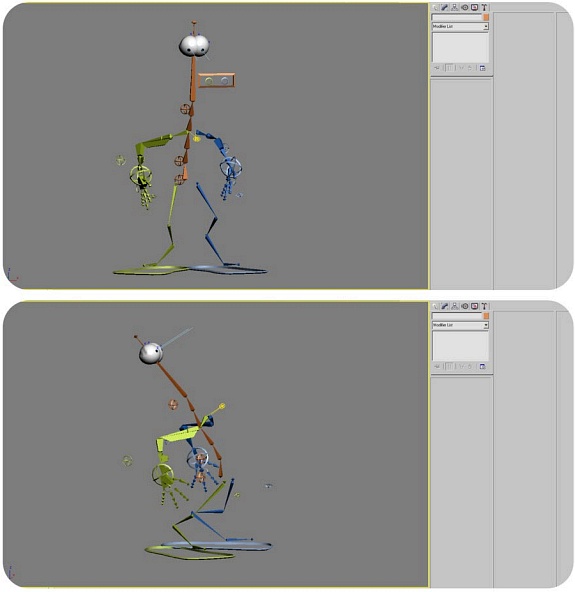
resolute the Spine Once, we must begin on the part of
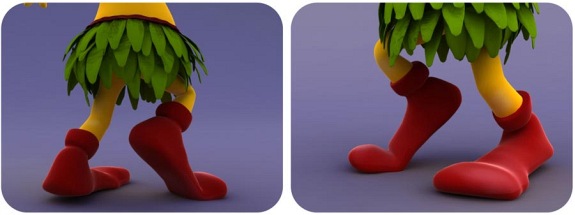
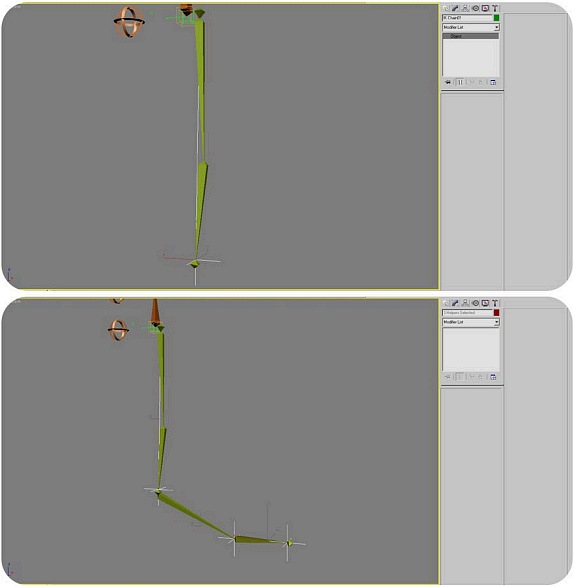
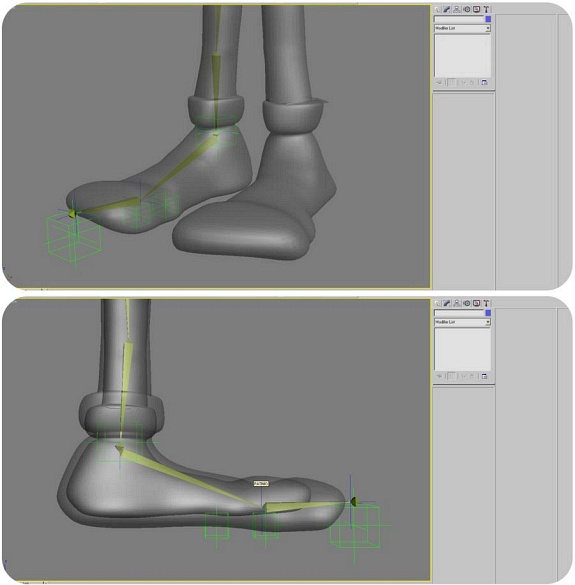
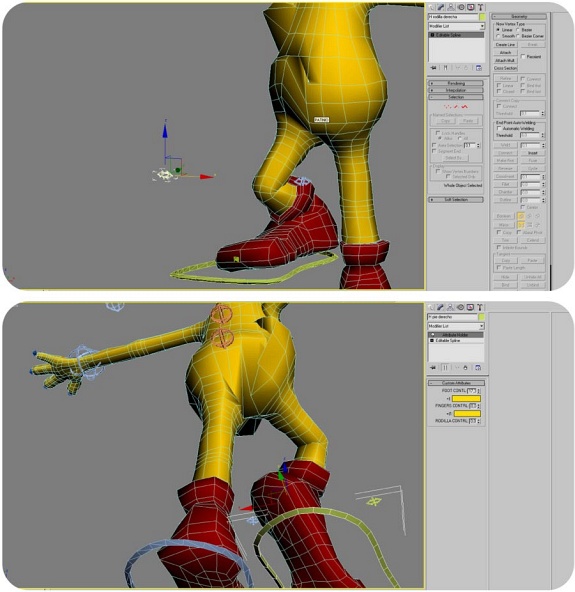
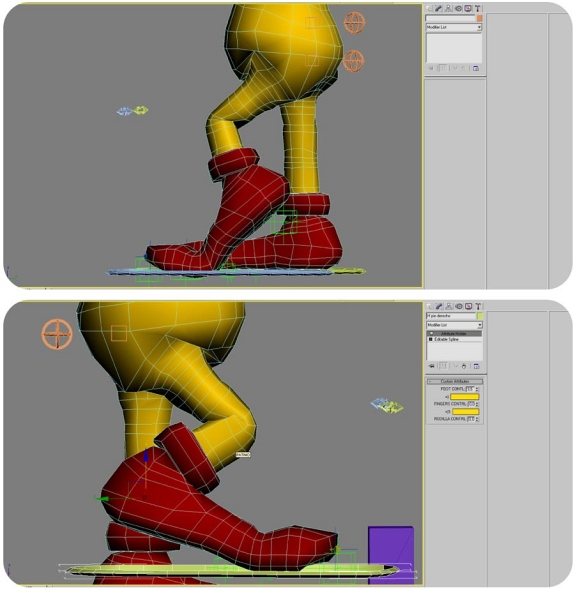
another one rigg that is the one of the leg and feet....
a: Similar as I constructed the Spine
with respect to bones we created the bones necessary to define the
structure that is going them to move, and this is defined applying to a HI
IK solve... becouse is the system that more good react for hierachys
complex and are quite light in calculations to solve them in simple move
within 3dmax
b: Next we pass to the foot, and
adding some bones in the right place of pivots, we return to put HI IK
solve.
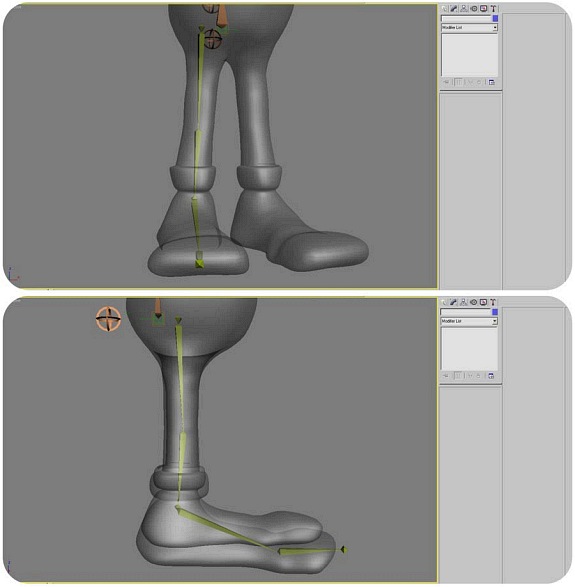
Once defined the structure, we used the same
logic.... Objects to helper that to serve to us as help to facilitate the
movements.
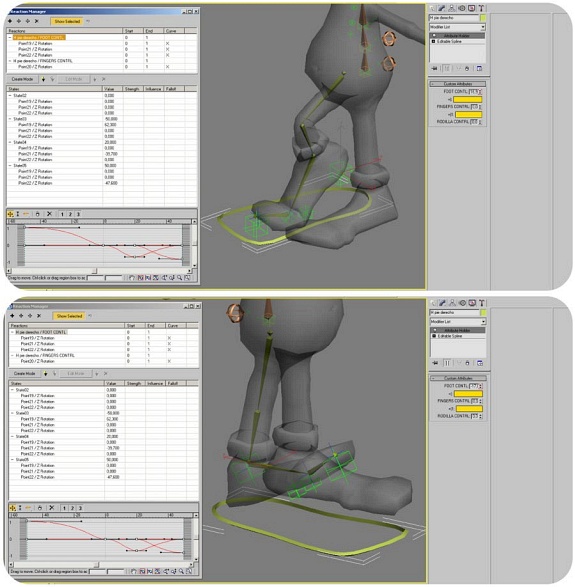
This hierachy is important because by means of
Parameter Editor of max we are going to construct spinners that by means
of reactrions we are going to control to make the movement very easy of
the feet.
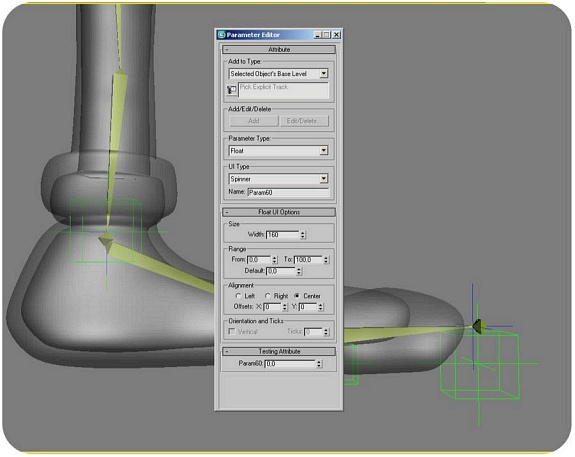
With the link Reactions the logic to follow is
that starting off of an object that we created and we called Masters and
this it will have Slavers that is helpers and of these to control them by
spinners of custom atributes.

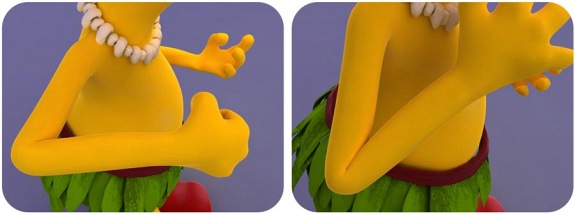
Okyes now yes is to good moment to go the next
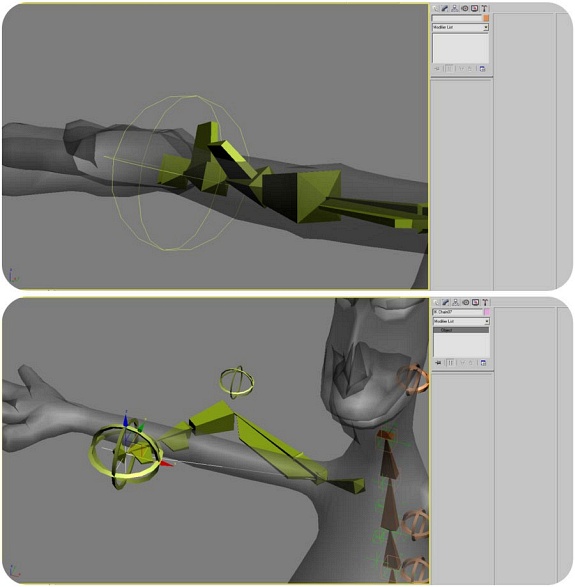
step.... the arm and hand to other step you have to hard riggingwork
=)
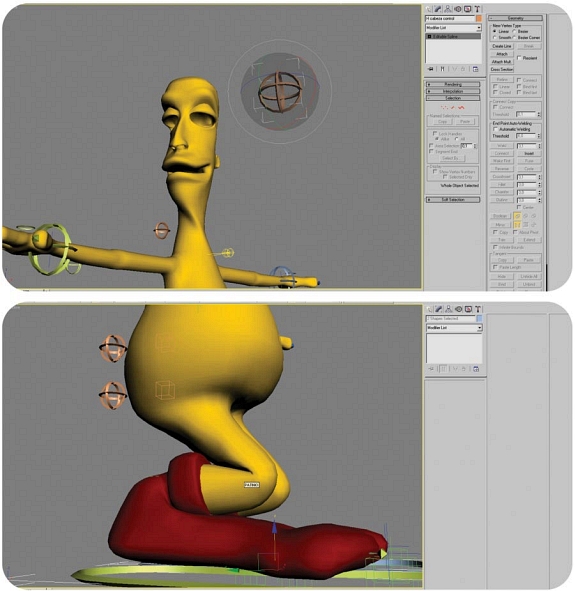
For the arm, the firts is to establish where it located
the parts of bones and here it is where to have the body in a neutral
state it serves to us helpful, we drew the part of Spine left and arm
until the hand.
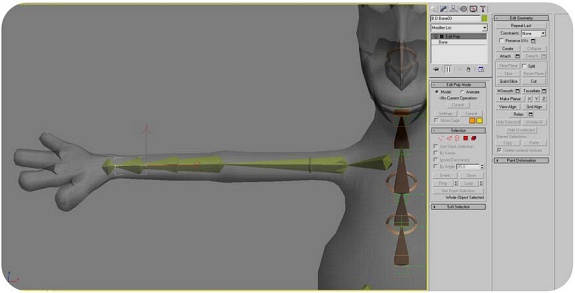
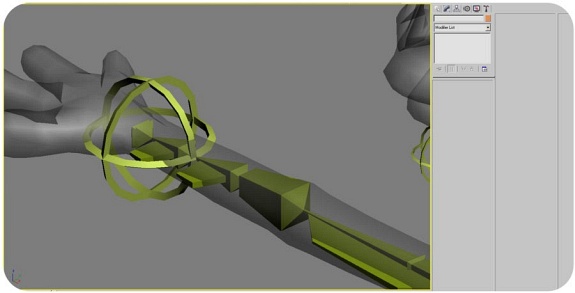
For the forearm is prepared more two bones, than
they will do of torsion at the time of controlling to mesh to obtain the
effect, of the bones of our forearm human.in the same way that with
constraints we created a dependency to obtain progressive movements.
The solvers for the arm is seetting, which uses a HI IK
to solver above by the same explained reasons. And setting the chain of
solve.
one can use any object like helper, but Something that is really
is of help for my, in this case uses the objects helpers of Paul Neale,
that can free download these script from page of Paul http://paulneale.com/ that and others
script that is incredible.
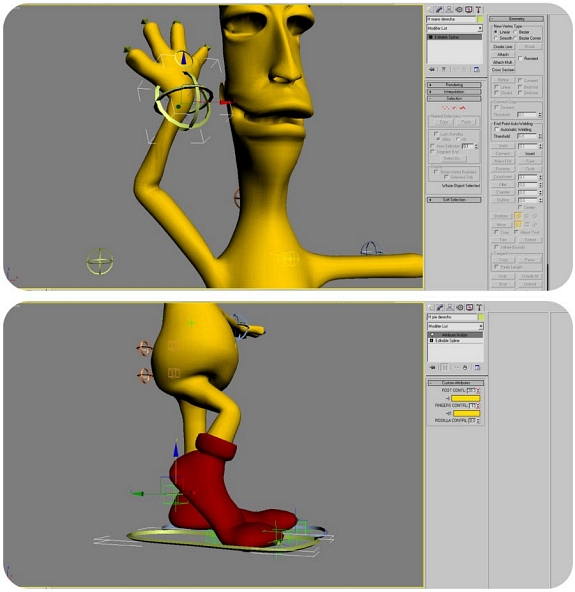
Now the hand is the part to
take more time to rigg correctly but later is more easy for animating,
realy east time it is worth gold, believe meThe construction of the
hand will be just as the one of an arm or a leg, we drew or we created
located bones where the structure for mesh
we need to create a
pivot.
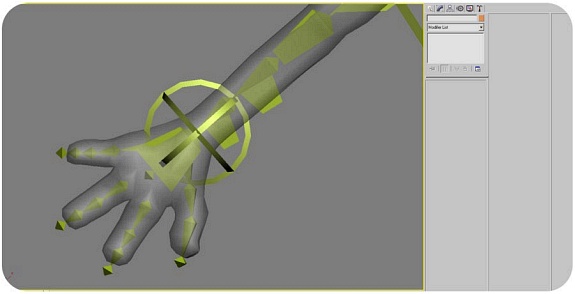
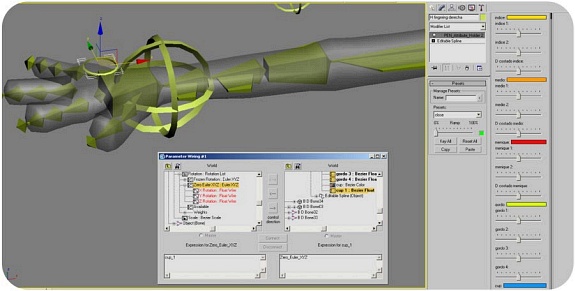
Now that controlled it? wirring and we created a
series of attributes holders that will be applied when located helper
above of the hand, and that in this case was creative with attributes
holder 2, of Paul neale, also they are possible to be download from the
Webpage, script that has the ability to keep pressets from position which
makes the animation very easy of the hand.
Now the neck, is easy part, must create the
bones that comprise of the neck and the head these linking to the system
of the Spine and later we created like always helpers that it helped us to
rotate the bones, using the progressive logic of
movements.
Now one of rigg more easy is with the eyes to
use look AT constriants, to an object helper that it helps to do that the
character watches to where look.

For last ...needed to
integrate each one of those rigging that now are separated and to cause
that they are integrated... linking rigg of the legs to the column and the
arms to the column also
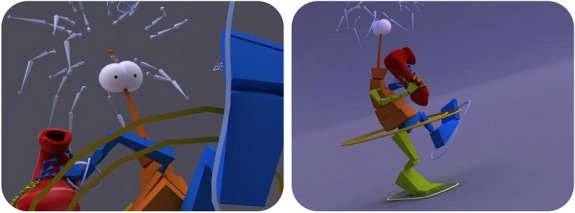
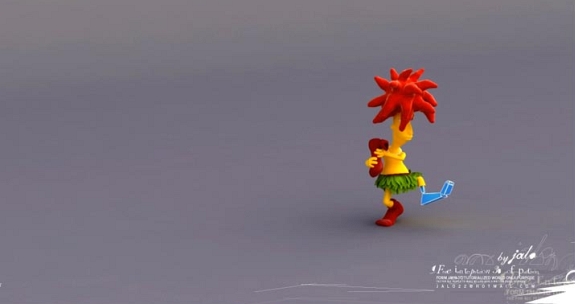
Once we arrived at this point, he is good step to think
on the operation of rigging and to test some of movements and if the
rotations make the logical movements for the character, we
constructed. We duplicated or re riggining the left side of character and
testing movement.
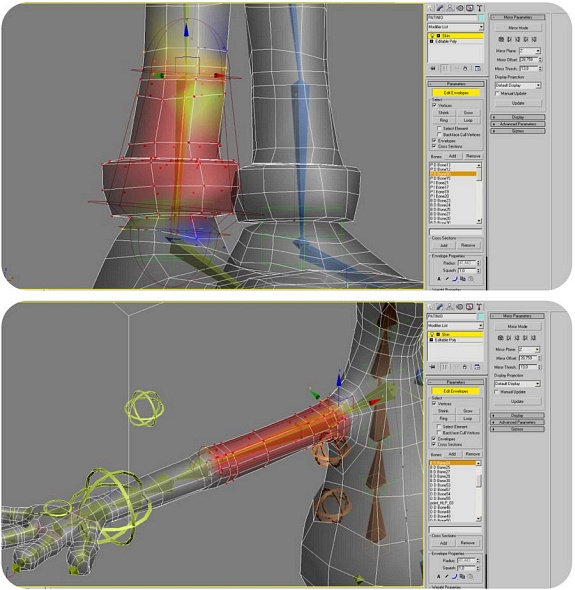
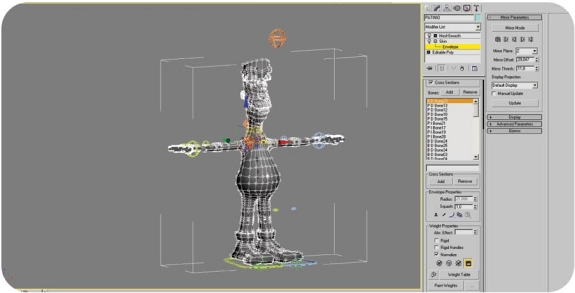
Skinning....
If
everything works as we waited for, yeah people are moment for breathing
deep and for beginning what the process of skinning, as we mentioned
before this is the moment where we do that rigging that we constructed I
interacted and it modifies or it follows mesh that we modeling
previously.
A detail, does not forget rigging the objects to me that
form the character but who these will be riggined after skinning, why?
Because by the type of objects that are is necessary first to have a
correct solution for the skin, since these go by above of the skin, then
we needed to know where deform,and after to adjust them, the objects.
We go direct to the process of skinning, first it is to
select mesh and to apply modifier SKIN - this is the one that helped us
to that mesh deform assigned by bones.
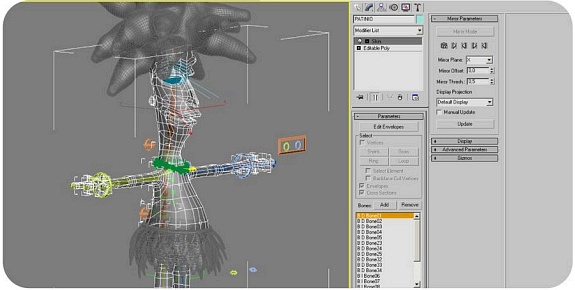
The following thing is to add the bones that we
created necessary to control the skin and then we chose bones and we began
to see as skin moves, using helpers....
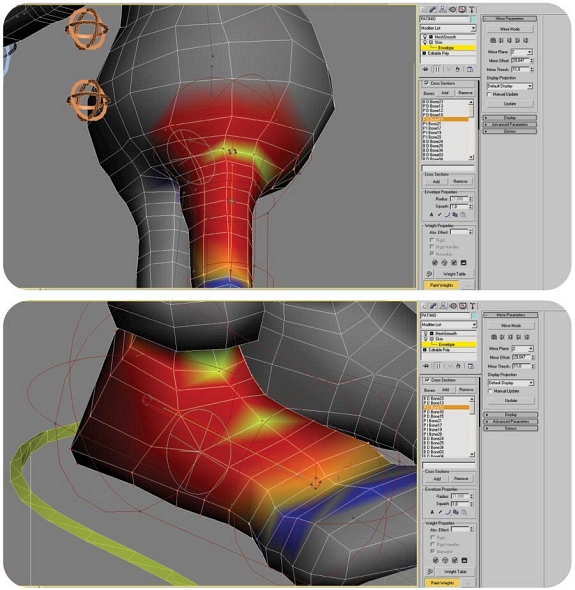
Okay see the result and is realy bad jeje. the first
is Not to be scared, and if we can be smile of this. It is a good
beginning. After testing and to see that nothing moves as it
seems... begins the beautiful process of skinnig... and I say it
sincere... I likes much the part of skiing. First it is to begin to define
envelopes for each bone so that it surrounds the necessary areas and
space.
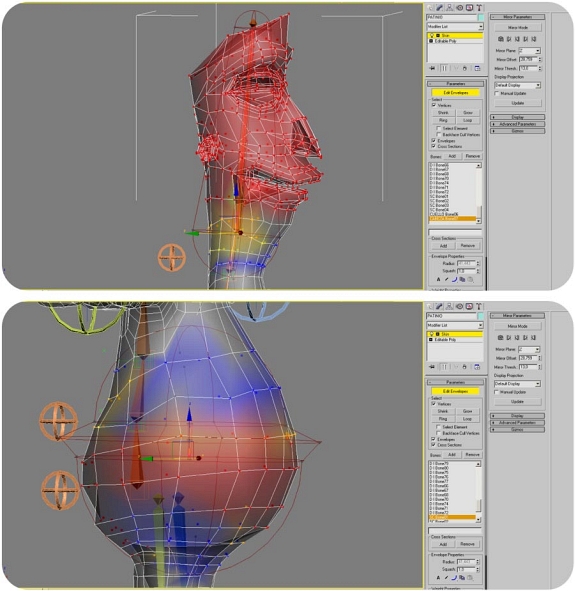
And testing to see again as skinning
works.
Okay everything works mabye a
little better but to not sufficient like saying to finished work.....un it
point that Is necessary to understand that with the phase of envelopes, we
do not have to solve all the movements of skinning in this phase. The next
step to skinning is bake vertex....
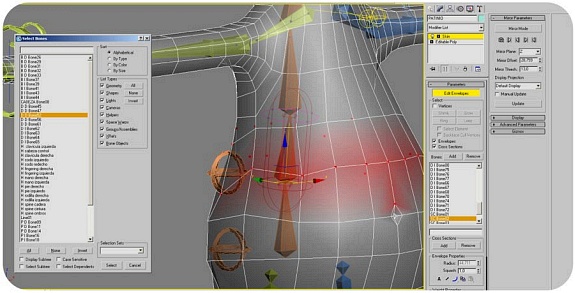
The process follows.
When we obtained best the possible thing with envelopes.. We decided that
it is moment for happening to bake and this is to decide that we passed to
the process of Paint Weight... this process is the one that will make that
the parts and you pivots of the character are seen
better.
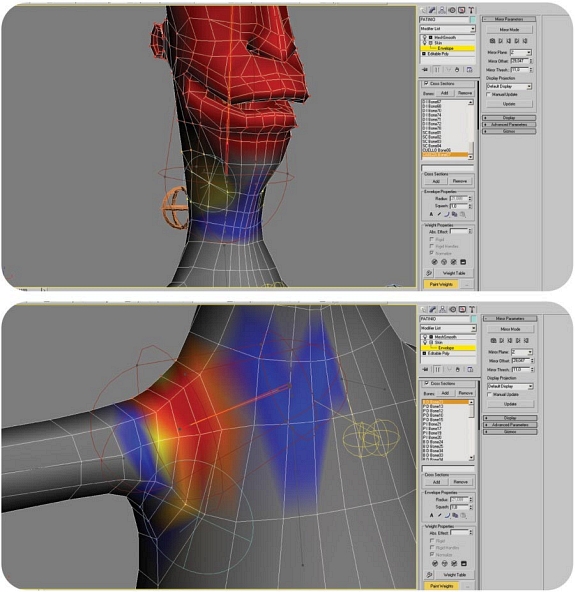
Once finished baking and Paint Weight testing you
movements again and we verified that everything works to our expectations,
we can pass to finishing step.
The next is pass to the part
of rigging, and this it is focused in the objects, that we needed, and
these are two. The necklace and the foliage
Both after testing several from linking to bones
riggined, I found that most effective and fast to calculate is Skin Wrap,
both objects are riggied of that way and the result is to my eye, the
looked for one.
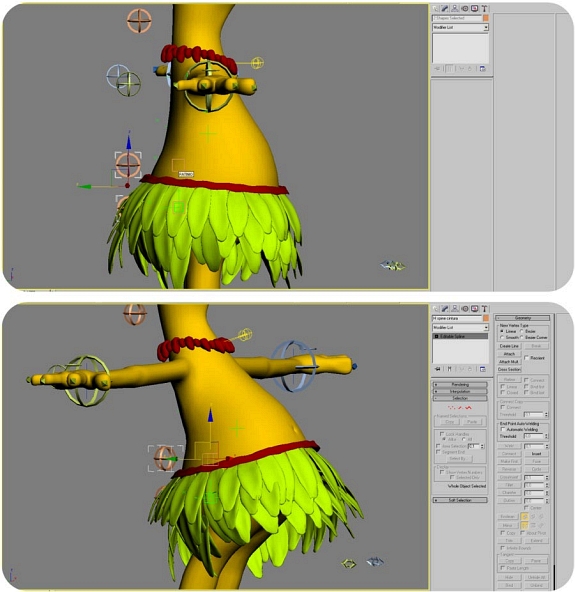
Now after testing several it lacked something
essential and it was the hair. The tests that I did with Flex were not the
wished ones. And inevitably I had rigging each hair, with
bones...
Now the following thing was to decide that he
was the best thing to control and to give him to life... with rotation
constraints was the solution.... With his helper that they help to give
movement hair.

We followed complete the character, always
create a a pair of objects to helper that I call Masters and gives the
possibility us of handling to the character, and to make movements that
surrounds several to helper, with which we obtained movements of almost
all the body, the idea is linking several to helper to these masters and
thus to obtain better movements, like better rotations of the body or to
walk.
A render stage =)
Okay the important thing of this
process is great... since from it is the part here that will give
naturalness him to the deformations that character has, by its movement...
the animation is the one that will really give life him... it is a very
important point... that we happen making Test and animations and drawing
talvez in paper our ideas... or systems Rrigging...
try to think it like parts of systems that are united by
the same system, takes time but they create is a realy great movement to
the character me... =), Thanks for the interest to read this tutorial.
And they remember, love what they do and they go it to do
well, Thanks to all what they do that today this doing this... and we see
in makign the facial and texturing of for Sidehow bob.
all the best yours.!
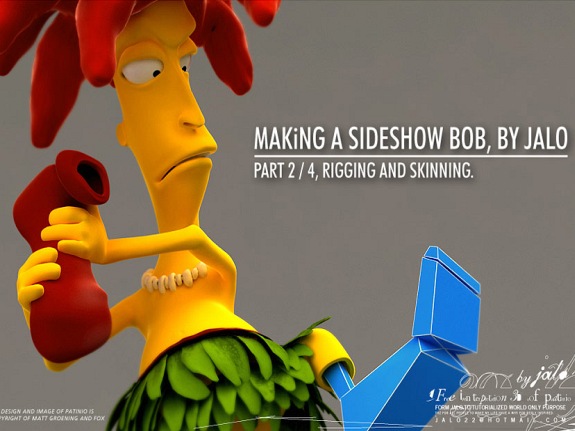
MAKiNG A SIDESHOW BOB TUTORIAL BY
JALO
PART 2 / 4 RIGGING AND SKINNING.
16-01-2007 Argentina - jalo22@hotmail.com - http://www.jalo.tv/
Link: to wallpaper : wall02
Trademark & Copyright, Jalo and Logo
and its related entities. All rights reserved.
diseño animacion grafica arte musica
| 
